Getting Started with Manager
When you finish this page, one avatar is running on MingToon materials. It takes about 15 minutes.
Before you start
- A project that finished Installation
- One avatar placed in the scene
- A project backup
1. Add Manager to the avatar root
- Select the topmost object of the avatar in the Hierarchy.
- Press
GameObject > MingToon > Add MingToon Managerfrom the menu.
You are fine when MingToon Manager appears in the Inspector with three tabs. The tabs are Get Started · Look & Bake · Optimize.
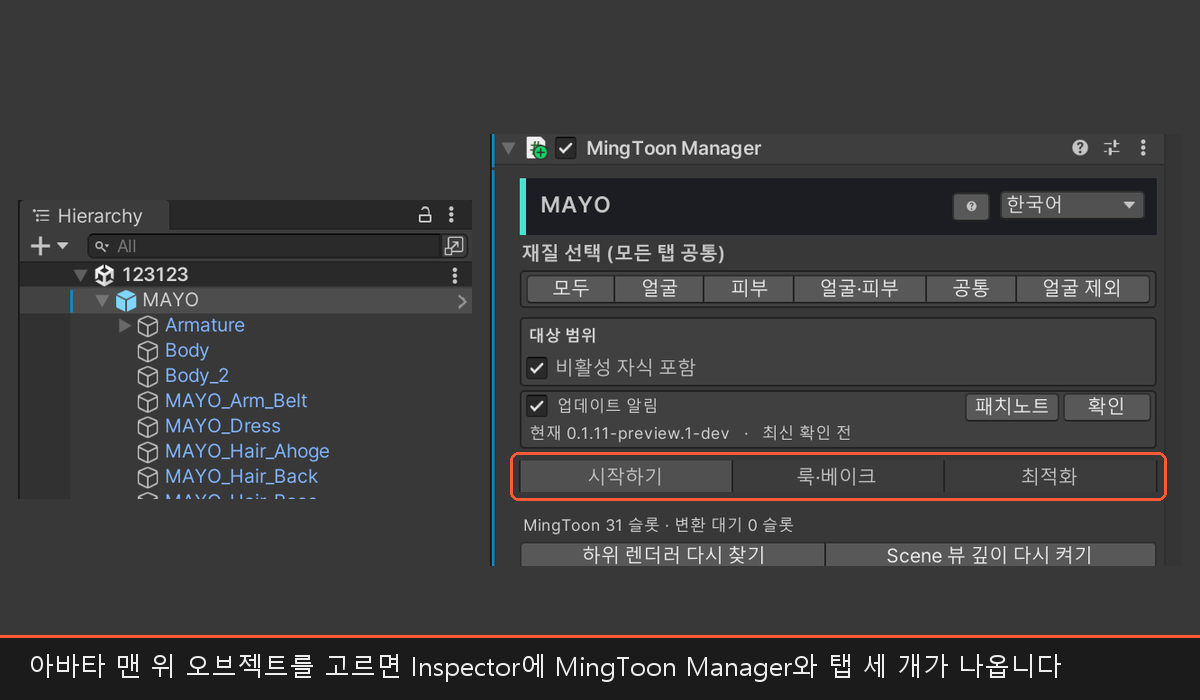
Manager remembers how far upload optimization should treat this as one avatar. Keep it on the avatar root even when you only edit an outfit.
2. Assign the face and skin renderers
Find 1. Assign face & skin renderers on the Get Started tab.
- Put the face mesh into Direct Face Renderer.
- Put the bare skin mesh into Direct Skin Renderer.
- Press Mark Roles on the Named Renderers.
You are fine when the slot list shows Face and Skin.
Leave the hair and clothing slots as Regular.
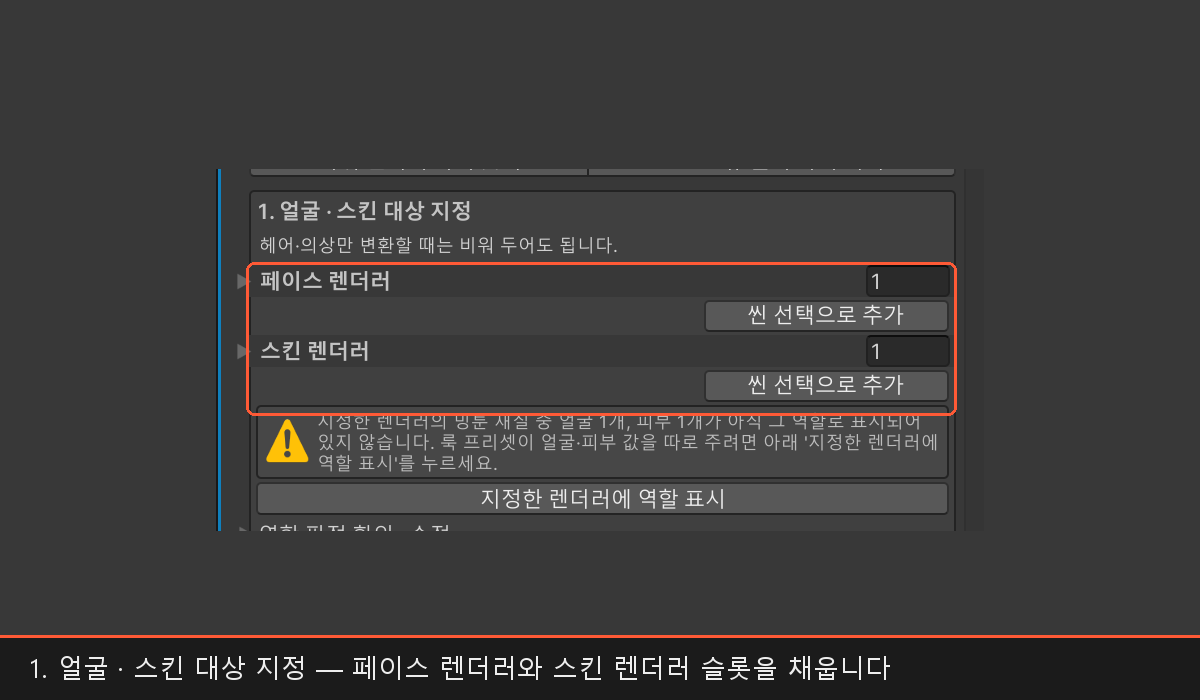
Leave both fields empty if you only convert hair and clothing. For details on role assignment, see Role assignment in detail.
3. Choose the conversion presets
Find 2. Choose look → Convert on the same tab.
- Pick Basic Toon High in Look Preset On Convert.
- Pick Keep Existing Values in Color Preset.
Basic Toon High is the reference look that turns depth effects on. Pick Basic Toon Low for a lighter result. Keep Existing Values leaves the color and shadow values read from the source untouched.

4. Run the conversion
Press Convert Child Materials to MingToon inside the same 2. Choose look → Convert card.
The source materials are not deleted. New MingToon authoring materials are created, and only the slots change.
5. Check the conversion result
Read the Converted slots · Excluded slots · Failed slots counts on the result line.
If failed slots is above 0, check those materials first.
Excluded slots are families like particles that are left alone on purpose.
Which materials get excluded is listed in Slots that are not converted.
6. Refine in Quick Settings
Select one face material and open Quick Settings in the Inspector.
If a row shows (Module Off), press Turn This Module On next to it first.
- Lower 1st Shadow Blur to 0.05. The default is 0.3.
- Raise Outline Width to 2. The default is 1.
- Move the saturation in Base Map HSVG in steps of 0.05.
You succeeded when the shadow boundary sharpens and the outline thickens.
Check that it worked
- The avatar is not magenta (pink).
- The face slot shows
Face. - Failed slots is 0.
- Changing a value in Quick Settings updates the view immediately.
If any item does not match, go to Troubleshooting.
When you finish editing, run the VRC SDK upload or the WARUDO mod build as usual. Automatic optimization runs at that point. You do not need to press a manual Bake first.